Hunting note
Start with the decision, then inspect the details.
A practical guide for homeowners and renters researching furniture purchases online on best led strip lights for bedroom, covering the best next steps, tradeoffs, and when to call a pro.
The best LED strip lights for a bedroom produce comfortable, even light without exposed bright dots, unreliable adhesive, noisy electronics, or an app that becomes essential to basic operation. The right kit depends on whether the strip will serve as soft ambient light, a reading accent, a closet aid, or colorful entertainment. One product rarely does every job equally well.
Plan the route and electrical supply before comparing colors. Measure each segment, identify corners and breaks, decide where the power supply and controller will remain ventilated, and choose a strip that can be cut and reconnected according to its instructions. Good installation is less about covering every edge and more about hiding the source while revealing a controlled wash of light.
Define the lighting job first
Ambient strips should bounce light from a ceiling cove, headboard wall, or shelf so the LEDs are not visible from bed. Task lighting needs useful brightness and good color quality at the surface. Decorative RGB effects prioritize color range and animation, while circadian-style evening use benefits from smooth, low-level warm white. Decide which function matters most before buying a feature-heavy kit.
Strips should complement a proper ceiling light, bedside lamp, or other safe general source. They are not an ideal sole light for cleaning, finding small items, or navigating stairs. If a bedroom doubles as a workspace, use dedicated task lighting rather than raising a perimeter strip to an uncomfortable glare level.
Measure the route and power location
Measure the actual mounting path with a flexible tape, including returns and gaps. Do not assume the room perimeter equals the strip length: doors, wardrobes, outlets, and the selected visual route change the total. Locate the nearest suitable receptacle and calculate how the low-voltage cable will reach the first LED without crossing a walkway, being pinched by furniture, or hanging visibly.
Long runs can lose brightness or shift color toward the far end because of voltage drop. Manufacturers may limit continuous run length or require power injection and larger conductors. Do not improvise those changes without product-specific instructions. For multiple walls, separate listed kits or a properly designed system can be safer and more consistent than chaining beyond the rated maximum.
| Bedroom goal | Useful specification | Installation priority |
|---|---|---|
| Soft evening glow | Tunable or dedicated warm white | Hide strip in a cove or channel |
| Accurate closet color | High color rendering white | Neutral color temperature and diffuser |
| Color scenes | RGB or RGBW with smooth control | Preserve a usable dedicated white channel |
| Low night light | Deep stable dimming | Avoid visible dots from bed |
| Renter installation | Removable channel or approved clips | Test finish and plan clean removal |
| Long perimeter run | Appropriate voltage and rated length | Follow feed and controller limits |
Compare RGB, RGBW, and tunable white
Basic RGB strips create white by mixing red, green, and blue, which can look tinted and render room colors poorly. RGBW adds a dedicated white channel, making it more useful for everyday bedroom illumination. RGB plus tunable white provides warm and cool white options but requires a compatible controller and usually costs more. A white-only strip may deliver the best quality for a room that does not need color effects.
Marketing names are inconsistent, so inspect the diode layout and controller specification rather than relying on “millions of colors.” Look for published color temperature, color rendering, brightness, and cut intervals. Color accuracy between separate reels can vary. If matching runs are visible together, purchase compatible reels from the same product line and test them before permanent installation.
Choose comfortable brightness and dot-free diffusion
Raw LED points can be distracting, especially when reflected in a television, mirror, glossy headboard, or window. Mount the strip where users see the illuminated surface rather than the diodes. An aluminum channel with a diffuser creates a cleaner line, protects the strip from contact, and can help manage heat. The diffuser reduces output, so account for that when choosing brightness.
LED density affects how continuous the line appears. Closely spaced diodes are easier to diffuse than widely spaced ones, but channel depth and viewing distance also matter. Temporarily tape up a short powered sample and view it while sitting, standing, and lying in bed. Check reflections with the room dark. A strip that looks smooth in a product close-up may show distinct dots across a real wall.
Check the power supply and electrical safety
Use the listed power supply, controller, connectors, and cable specified for the system. The supply must be rated for the connected load with the manufacturer’s required margin. It should remain accessible and ventilated, not buried in bedding, insulation, a wall cavity, or a stuffed drawer. Heat, buzzing, discoloration, a damaged cord, or repeated shutdowns are reasons to unplug the system.
Buy products carrying appropriate certification from a recognized testing organization for your market. Plug them into a sound receptacle without overloading adapters. Never route mains-voltage cords under rugs, through doors, or where furniture can crush them. New receptacles, hardwired drivers, or wiring inside walls require a licensed electrician and local-code compliance.
Understand controls, apps, and privacy
An inline button or infrared remote is simple and keeps basic functions available when Wi-Fi fails. Bluetooth control avoids a cloud account but has limited range. Wi-Fi adds schedules and smart-home scenes, yet may require an account, ongoing app support, and network permissions. Check whether the strip can still turn on, dim, and select a useful white without the app.
Review timer behavior, memory after power loss, standby lights, microphone permissions, update policy, and compatibility with the household’s network. Music-sync effects can be entertaining but are rarely a reason to accept poor white light or safety credentials. A physical controller reachable from the doorway or bed often matters more than a large scene library.
Prepare the surface and manage adhesive
Adhesive fails on dust, grease, textured paint, cold walls, and some low-energy plastics. Clean the mounting surface as directed, let it dry, and test a small area. Fresh paint may need to cure fully. Do not add strong solvent-based glue that can damage the strip, wall finish, or create fumes. Manufacturer-approved clips or channels provide mechanical support and make straighter lines.
Renters should test adhesive in an inconspicuous location and obtain permission where necessary. So-called removable tape can still peel paint, especially on poorly bonded layers. Mounting a channel to an approved board or furniture component may reduce wall contact, but do not puncture electrical equipment or weaken furniture. Keep strips away from fabric, mattress edges, and places where they can be pulled.
Handle corners, cuts, and connectors properly
Most strips should not be folded sharply around a ninety-degree corner. Use the permitted bend radius, a purpose-made corner connector, or cut only at marked points and reconnect with compatible components. Cutting elsewhere can disable a segment or expose conductors. Observe polarity and channel order; an RGB connector attached backward may produce wrong colors or no light.
Solderless connectors are convenient but can loosen or create visible dark gaps. Secure them without pinching and test every color and brightness level before mounting. Soldering requires skill, ventilation, and protection of furnishings; do not work over bedding or carpet. If the system design needs custom wiring, power injection, or concealed cable, ask a qualified low-voltage professional or electrician.
Choose bedroom locations that look intentional
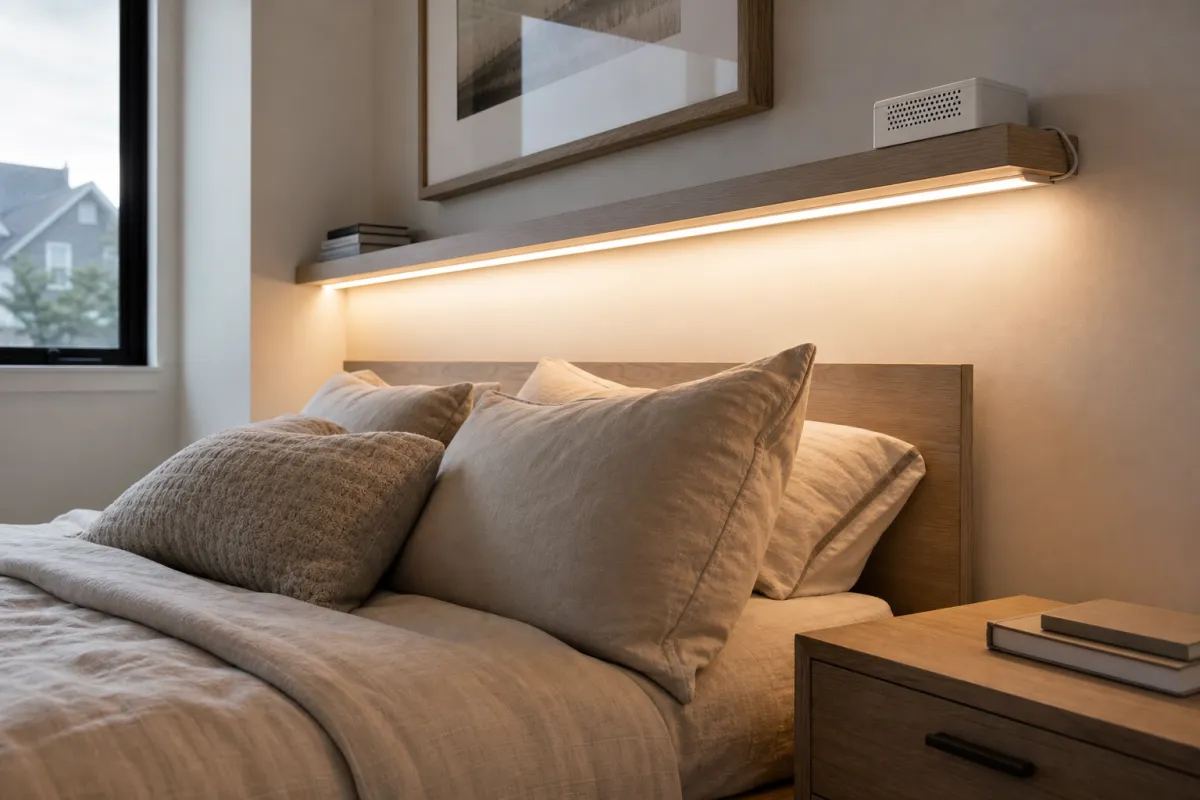
Behind a headboard, light should wash the wall rather than shine toward pillows, and the strip and cable must remain clear of bedding. Above a wardrobe, indirect uplight can make a low ceiling feel brighter if dust is cleaned periodically. Under a floating shelf, a channel can provide a tidy line. Ceiling perimeters work best when a molding or ledge conceals the source.
Avoid attaching strips directly to upholstered headboards, curtains, bed frames where movement can crush them, or surfaces close to heaters. Do not wrap them around cords or push the driver behind a mattress. In children’s rooms, keep strips, connectors, remotes, button batteries, and cables inaccessible. Decorative lighting should not introduce a pulling, entanglement, or small-parts hazard.
Avoid common buying mistakes
The cheapest long reel may pair low diode density with an undersized driver and weak adhesive. Comparing price per foot alone ignores color quality, controls, connector availability, warranty, and power design. Likewise, an expensive app does not correct visible dots or poor placement. Buy enough compatible channel, connectors, and cable at the same time so the system can be tested as a whole.
Do not install before testing the full reel. Check every color, the dedicated white, low-level dimming, remote range, noise, and heat on a nonflammable clear surface while following instructions. Do not exceed the rated length, mix unknown power supplies, conceal overheating electronics, or leave damaged segments energized. Retain packaging until the installation has operated reliably.
A practical buying and setup checklist
1. Define ambient, task, night, or color-effect priorities.
2. Measure the exact route, breaks, corners, and cable path.
3. Select white-only, RGB, RGBW, or tunable white intentionally.
4. Compare brightness, diode density, color rendering, and dimming.
5. Verify listed power components and maximum run length.
6. Plan an accessible, ventilated controller and power-supply location.
7. Use compatible channels, diffusers, clips, and connectors.
8. Test the complete strip before cutting or permanent mounting.
9. Keep cables, electronics, and strips clear of bedding and traffic.
10. Confirm useful manual control without relying entirely on an app.
A carefully planned shorter run often looks better than a room outlined indiscriminately. The goal is controlled illumination with a hidden source, dependable electronics, and controls that suit everyday use.
Frequently asked questions
Are LED strip lights safe to leave on overnight?
Use only listed equipment installed as directed, keep the power supply ventilated, and follow manufacturer guidance. For overnight navigation, a purpose-designed low-level night light may be simpler. Unplug any system that becomes hot, buzzes, smells unusual, or shows damage.
Is RGBW worth paying more for than RGB?
Usually, if the strip will provide everyday white light. The dedicated white channel often looks more natural than mixed RGB white. A white-only strip may be better still when color effects are unimportant.
How do I stop LED dots from showing?
Hide the strip from direct view and use an appropriately deep channel with a diffuser. Higher diode density, greater distance from the illuminated surface, and testing at the actual viewing angle also help.
Can I cut off extra strip length?
Only at marked cut points and according to product instructions. Cutting elsewhere can damage the circuit. Disconnect power first, seal or terminate the end as directed, and use compatible connectors.
What is best for renters?
Use a short tested route, manufacturer-approved removable methods, or a channel attached with landlord-approved hardware. Test the finish first, avoid aggressive glue, and preserve an accessible cable route that does not cross the floor.